
Slow 3PL client onboarding costs more than time. It pushes back go-live dates, creates manual rework, leads to billing mistakes, and raises service risk right when a new client is judging your operation most closely. When setup lives in emails, spreadsheets, and tribal knowledge, small misses turn into bigger problems fast.
That’s where WMS workflows help. In simple terms, they’re repeatable steps inside your warehouse management system that guide setup, receiving, storage, picking, shipping, and reporting the same way every time. So, faster onboarding isn’t about rushing, it’s about standardizing the work that repeats for every new client.
Modern platforms with strong warehouse management system features, barcode scanning, real-time inventory visibility, and integrations can cut setup time and reduce confusion across teams. As a result, your warehouse can move from client kickoff to clean execution with fewer handoffs and fewer surprises.
In this article, you’ll see what slows onboarding down, which workflows to build first, how to automate setup tasks, and how to measure success once the client goes live. The goal is simple, make onboarding faster without making it messy.
Find the onboarding bottlenecks before you try to speed them up
Many 3PLs push for faster onboarding before they know where time is actually leaking. That usually backfires. Speeding up a broken process just helps mistakes happen sooner.
A better move is to find the drag first. In most warehouses, the same issues show up again and again: missing client data, unclear SKU rules, bad item masters, manual carrier setup, uneven receiving steps, and user training that starts too late. When you map the work clearly, the slow points stop hiding in email threads and side chats.
Map every handoff from signed contract to first shipped order
Start with the full path, not just the warehouse setup. A new client does not go live when the contract is signed. It goes live when the first order ships cleanly, with the right inventory, rules, labels, and billing in place.
That means your onboarding map should cover the whole chain:
- Sales handoff to implementation
- Account setup in the WMS
- Client master data and contacts
- SKU and barcode import
- Storage, picking, and shipping rules
- Carrier and label setup
- Billing logic and charge mapping
- Testing and validation
- First inbound receipt
- First live order and shipment

Write each step in plain language. Then add three things beside it: who owns it, what input is needed, and what approval is required. This sounds basic, but it’s where delays usually show up.
For example, sales may promise lot tracking, custom labels, or retailer routing without giving ops the details. Meanwhile, billing may need service codes before the client profile is even complete. As a result, work stalls while teams chase answers.
A simple table can make handoff issues obvious:
| Step | Owner | Needed Input | Approval |
|---|---|---|---|
| Sales to implementation handoff | Sales | Signed scope, client rules, promised SLAs | Ops lead |
| SKU import | Implementation | Item master, barcodes, dimensions | Client |
| Carrier setup | Shipping or ops admin | Carrier accounts, service levels, label rules | Client |
| Billing setup | Finance or billing | Rate card, billable events, accessorials | Finance lead |
| User training | Ops lead | User list, roles, device access | Client and ops |
When you see blanks in this map, you have found a bottleneck. Unclear ownership is one of the biggest causes of delay, because everyone assumes someone else has it.
If your process still depends on one person remembering the next step, it is not a process yet. That is where a modern WMS solving 3PL onboarding pains can help turn tribal knowledge into repeatable flow.
If a handoff has no owner, it will sit longer than you think.
Spot the data gaps that create rework inside the warehouse
Warehouse teams can work around bad data for a day or two. They cannot scale on it. Every missing field in onboarding becomes extra motion, extra questions, and extra risk on the floor.
Before go-live, get clear on the data the client must provide. That usually includes:
- SKU details: item codes, descriptions, units of measure, pack sizes
- Barcode data: UPC, EAN, case barcodes, pallet labels
- Physical data: dimensions, weight, storage needs
- Control rules: lot tracking, serial tracking, expiry handling
- Order logic: split rules, routing rules, partial shipment rules
- Carrier needs: preferred carriers, service levels, client-owned accounts
- Billing details: storage logic, handling fees, special project charges

Messy item masters cause some of the worst rework. Maybe one SKU has three names, or dimensions are missing, or barcode formats do not match what arrives at receiving. Then the floor team has to guess. That slows receiving, breaks putaway logic, and creates picking errors later.
The same thing happens with unclear rules. If no one states whether an item needs FIFO, FEFO, lot capture, or serial scans, the warehouse starts making calls on the fly. That may keep freight moving, but it makes the process fragile.
Late carrier setup is another common drag. If labels, accounts, or routing rules are not ready, orders may be packed but not shipped. In the same way, late user training creates a quiet bottleneck. Users technically have access, but they do not know how to receive, pick, or fix exceptions in the system.
For 3PLs with complex client needs, strong onboarding and training for 3PL WMS can reduce this kind of rework before it hits the dock.
Separate one time setup work from repeatable workflow steps
Not every onboarding task should become a custom project. That is where many 3PLs slow themselves down. They treat every client as fully unique, even when most of the work repeats.
Instead, split onboarding into two buckets: one-time setup and repeatable workflow steps.
One-time setup usually includes client-specific items such as custom billing rules, unique label formats, special compliance needs, or channel-specific routing. Those tasks may need extra review, and that is fine.
Repeatable workflow steps are the parts that should look almost the same every time. Think account creation, user roles, standard SKU imports, receiving rules, pick methods, test orders, and go-live signoff. These are the tasks you should template.
Here is the practical test: if you do a task for almost every new client, build it once and reuse it. If only a few clients need it, isolate it as an exception.
This approach helps you standardize the 80 percent that repeats, while keeping room for the 20 percent that does not. As a result, your team spends less time rebuilding the same setup from scratch.
Too much variation makes scale hard. It also makes training harder, QA slower, and billing less reliable. A warehouse grows better when the base process is stable, then exceptions sit on top of it, not inside it.
A strong system with multi-client WMS features for 3PL onboarding makes this easier, because it lets you apply standard workflows while keeping client rules separate.
Custom work should stand out clearly. If everything is custom, nothing is under control.
Build a repeatable WMS onboarding workflow your team can use every time
A strong onboarding workflow should not live in one manager’s head. It should live in the WMS, where operations, customer success, and warehouse teams can all follow the same path. When each status, task, and approval is visible, new clients move forward with less back-and-forth.
This works best when your system supports mobile use, barcode scanning, and clear status tracking. In practice, that means your team can set up data faster, validate work on the floor, and spot gaps before they turn into delays.
Start with client setup templates for accounts, warehouses, and user roles
Templates give your team a head start. Instead of rebuilding every client from zero, you start with a proven setup for the account, warehouse structure, permissions, and rules that show up again and again.
For example, a template can pre-fill:
- Core account settings, such as client codes, contacts, service flags, and default workflows
- Warehouse locations, including zones, bins, staging areas, and multi-warehouse assignments
- User roles and permissions, so client users, supervisors, billing staff, and floor teams get the right access
- Billing fields, such as rate groups, charge triggers, and account references
- Operating rules, like allocation logic, shipping cutoffs, hold statuses, and exception handling
That matters because speed without control creates cleanup later. A reusable template cuts setup time, but it also cuts mistakes. Your team doesn’t have to remember every field, every toggle, or every permission set from memory.

Multi-site clients benefit even more. If one customer needs stock in two or three facilities, a template helps you apply the same account logic across locations while still keeping warehouse-specific rules separate. That keeps the setup clean and easier to manage as the client grows.
Think of templates as the foundation slab, not the full building. You still add client-specific details, but the base is already level. If your team wants a simple way to support repeatable tasks around setup and handoff, these essential WMS checklists can help reinforce that standard process.
The fastest onboarding teams don’t improvise the basics, they reuse what already works.
Standardize SKU, barcode, and inventory rules before inventory arrives
Item setup should happen before the first pallet hits the dock. If SKUs arrive before the item master is clean, receiving turns into guesswork, and guesswork spreads fast.
Start with the fields your floor team depends on every day. That includes SKU IDs, barcode formats, units of measure, case packs, inner packs, pallet quantities, and storage needs. Then layer in any control rules, such as lot tracking, serial capture, expiration dates, or special handling.
A clean standard should answer a few simple questions up front:
- What barcode will the team scan at each, case, and pallet level?
- What unit of measure is valid for receiving, storage, and picking?
- Does the item require lot, serial, or expiry capture?
- Are there temperature, hazmat, or restricted-access requirements?

This step pays off on day one. Receivers can scan and validate quickly because the WMS already knows what “right” looks like. Putaway rules work better because dimensions and storage conditions are in place. Later, if a client asks where a lot went or which orders used a serial-numbered item, you have a clean trail instead of a scramble.
It also protects traceability. When barcode rules and inventory controls are standard from the start, every movement has structure. That means faster receiving, fewer exceptions, and better recall readiness if something goes wrong.
Create workflow checklists for receiving, putaway, picking, and shipping
Once templates and item rules are in place, your team needs a clear playbook for daily execution. That’s where workflow checklists come in. They can live inside the WMS, alongside it, or in linked operating docs, but the goal stays the same: every shift follows the same process.
Receiving should tell the team what to scan, what to inspect, and what exceptions to flag. Putaway should define how locations are assigned and confirmed. Picking should spell out scan checks, short-pick handling, and priority rules. Shipping should cover final verification, label steps, and status updates before release.
Here is where checklists help most:
- Training new staff faster: People learn the process without relying on tribal knowledge
- Keeping shifts consistent: Day shift and night shift work the same way
- Reducing missed steps: Small checks happen before they become big errors
- Improving scan-based accuracy: Barcode validation keeps inventory and orders aligned
That scan-first discipline is the heart of good barcode-based inventory management. When the WMS guides work through a mobile device and confirms actions with a barcode scan, your team moves faster with fewer manual corrections. It’s one of the clearest ways a WMS cuts setup noise and operational drift. For more on that link between process control and accuracy, this guide on how a WMS reduces warehouse errors is worth a look.

A good checklist also improves status tracking. You can see what is complete, what is blocked, and what still needs approval. That shared visibility matters because onboarding is never just a warehouse task. Customer success needs progress updates, ops needs clean execution, and leadership needs confidence that go-live won’t turn messy.
If you want a practical starting point, warehouse receiving checklists and other standard operating guides can help your team document the exact steps each client should follow. When those steps are repeatable, onboarding stops feeling like a custom project every time.
Use automation and integrations to cut manual setup time
Fast onboarding depends on one simple idea: enter data once, use it everywhere. When your WMS connects to the systems your client already uses, your team spends less time copying data, chasing updates, and fixing avoidable mistakes.
That matters before go-live, not after. Early automation gives you cleaner test data, faster approvals, and fewer surprises when the first real orders hit the floor.
Connect order, inventory, and shipping systems early in the process
Integrations should be part of setup, not a last-minute task. If you connect systems early, you can validate test orders, inventory syncs, and shipping rules before the client is live. That gives your team time to catch mapping issues, missing fields, or bad carrier settings while the stakes are still low.
Common connection points usually include shopping carts, marketplaces, ERPs, EDI partners, accounting tools, and carriers. When those systems feed the WMS directly, order data, item updates, tracking, and billing details move faster and with fewer errors. Your team is no longer keying the same data into three different places.

A practical setup sequence looks like this:
- Connect the client’s order sources first.
- Sync the item master and inventory fields next.
- Add shipping methods, carrier accounts, and label rules.
- Test acknowledgements, tracking updates, and invoice flows.
If you need a starting point, review these WMS integrations for connected workflows. It helps to know which systems can plug in cleanly from day one.
Automate alerts, approvals, and exception handling
Automation works best when it handles the routine and flags the unusual. Your team should not spend the day checking whether every order imported, every SKU has a barcode, or every low-stock item needs attention. The system can watch those signals for you.
Set up alerts for problems like missing barcode data, failed order imports, low stock, bad addresses, unusual routing, or return exceptions. Then add approval steps where human judgment still matters, such as custom freight routing or returns that need inspection.
Automation does not replace people, it protects their time for the work that actually needs a decision.
That shift is huge during onboarding. Instead of checking everything by hand, your team focuses on the handful of records that need action.
Use pre go live testing to catch errors before the client does
Testing speeds onboarding because it prevents cleanup later. A rushed launch with bad data is like opening a new lane in traffic with potholes already in it. Cars still move, but not well.
Run a small set of real-world checks before launch:
- Sample receipts to confirm SKU setup and barcode scans
- Putaway tests to verify locations and movement rules
- Pick and pack trials to confirm units, labels, and packing logic
- Shipping label checks to validate carrier services and tracking flow
- Invoice validation to confirm billable events and charge rules

Keep the test set small, but make it realistic. Include edge cases, not just the easy orders. A few hours of pre go-live testing can save days of live issue handling, client frustration, and manual rework later.
Train the client and your warehouse team around the same workflow
Fast onboarding gets easier when both sides follow the same map. Your client should know what to send, your team should know what to scan, and everyone should know who to contact when something breaks. The best process is easy to follow, not hard to memorize.
That shared workflow cuts email loops, last-minute fixes, and mixed signals on launch week. It also makes role-based training simpler, because each person only needs the steps that fit their job.
Give clients a simple playbook for data, labels, and inbound rules
Before launch, send the client a short, practical playbook. Think of it as the operating manual for a smooth first receipt. If you leave this to scattered emails, people miss details and the dock pays for it later.
The playbook should cover the basics in plain language:
- Data import templates: item master fields, required formats, and which fields can’t be blank
- Barcode requirements: what barcode formats are accepted at each, case, and pallet level
- ASN expectations: when advance shipment notices are required, and what data must be included
- Packing rules: approved carton contents, mixed-SKU rules, and pack-size standards
- Carton labeling instructions: label placement, scannability, and any client-specific label needs
- Return workflows: how returns are identified, received, inspected, and restocked
- Shipping cutoffs: daily order deadlines, late-order handling, and weekend rules

Keep the document simple enough that a client can hand it to their ops contact, warehouse lead, or brand manager without translation. In other words, write it for real use, not for filing away. A clear playbook reduces back-and-forth, speeds approvals, and prevents delays that should never happen in the first place.
If the client has to guess what “ready” means, onboarding will slow down.
A short communication plan helps here too. Spell out who sends data, who approves labels, who owns inbound questions, and how issues get escalated. That way, the workflow stays visible instead of living in someone’s memory.
Train warehouse staff with real client scenarios, not generic demos
Generic training looks fine in a meeting room, but it falls apart on the floor. People learn faster when they handle the same SKUs, receipts, and order patterns they’ll see after go-live. That’s why hands-on practice beats abstract demos every time.
Use sample SKUs that match the client’s catalog. Build sample receipts that reflect their inbound mix. Then run test orders that mirror real picking, packing, and shipping steps. If the client uses lot tracking, train on lot tracking. If they ship kits, train on kits. Keep it close to real life.

Role-based training matters just as much. Receivers need to know scan steps, exception handling, and putaway confirmation. Pickers need order logic, unit-of-measure rules, and short-pick actions. Customer-facing users need status visibility, not warehouse-level detail. When each role gets the right view, the process feels clear instead of overwhelming.
Mobile scanning should be part of training from day one, because that’s how the workflow gets enforced in real time. The same goes for visibility. Teams work better when they can see what was received, what is on hold, and what is ready to ship without chasing updates. Strong inventory management software supports that control with live stock status, barcode-based validation, and cleaner handoffs between office and floor.
This approach also helps the client trust the process. They can see that your team is not learning in theory. You’re rehearsing their operation before their first live order hits the system.
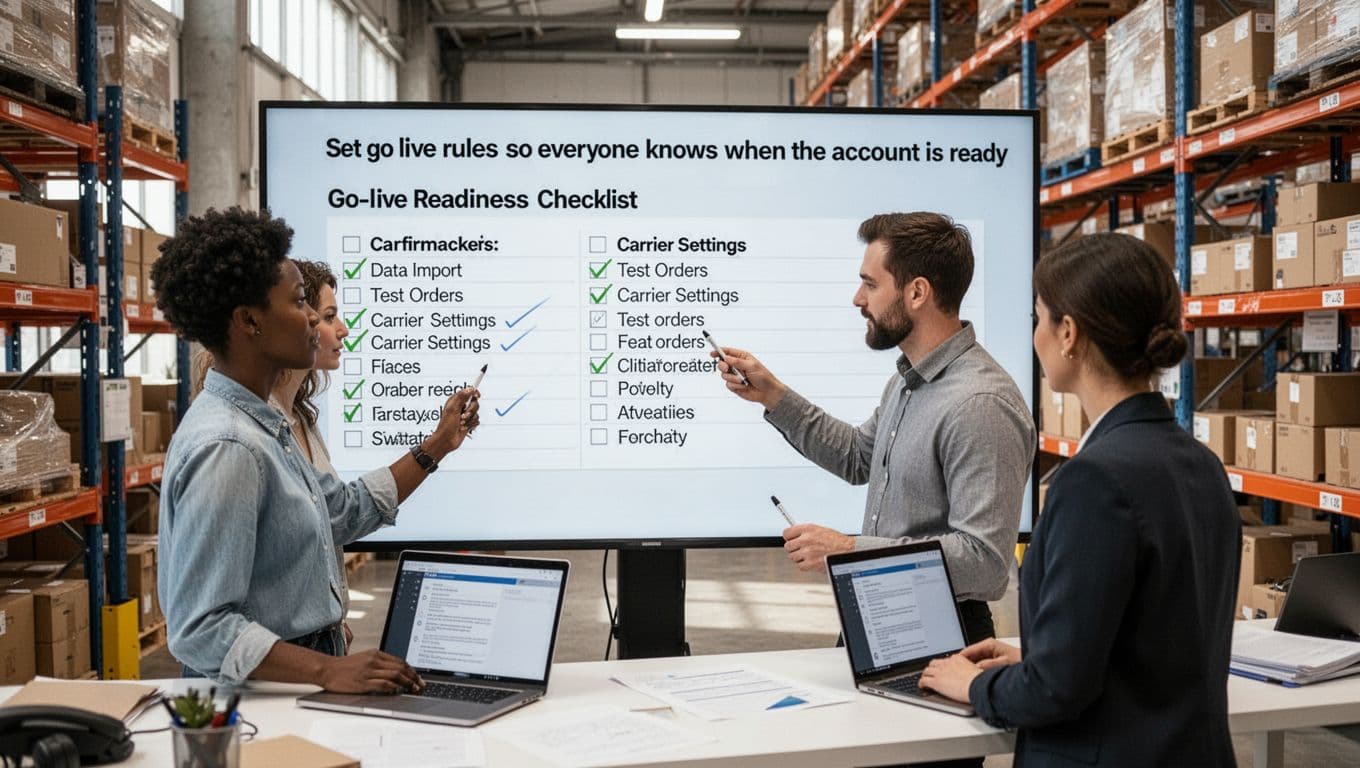
Set go live rules so everyone knows when the account is ready
A go-live date should be earned, not guessed. Without clear rules, one team thinks the account is ready while another is still fixing labels, carrier settings, or user access. That’s where confusion starts.
Set simple readiness criteria and review them together before launch. A short list works best:
- Data import is complete and key fields have been validated.
- Test orders have passed from order import through shipment.
- Carrier settings are verified, including labels and service methods.
- Warehouse users are trained on the client’s actual workflow.
- Client users are trained on the tasks they own, such as data updates or order review.
- Labels are approved for inbound, outbound, and any special routing needs.
- Billing checks are complete so charges post correctly from day one.
Put these rules in one shared document and assign owners to each item. Then confirm status in a short launch meeting. This keeps communication clean and removes the “I thought that was done” problem.
Clear go-live rules stop premature launches and reduce friction between teams. More importantly, they give the client and your warehouse the same definition of ready. When both sides agree on that point, onboarding moves faster and first-week execution gets a lot more stable.
Track the right onboarding metrics and improve the workflow each month
If you want onboarding to get faster without creating new problems, you need a simple scorecard. What gets measured gets improved, but only if you track the numbers that show both speed and quality. In a 3PL, that means looking past the launch date and checking whether the client was set up correctly, trained properly, and supported well in the first month.
The goal is not to build a huge dashboard. It’s to pick a few clear metrics, review them after every launch, and make small fixes every month. That rhythm helps your team cut onboarding time while protecting service.
Measure time to go live, setup accuracy, and first month service performance
Start with a short list of onboarding KPIs that your team can trust. Think of them as the dashboard lights on a truck. If one turns red, you know where to look before the whole trip goes sideways.
A practical set of core metrics includes:
| KPI | What it measures | Why it matters |
|---|---|---|
| Days from contract to go live | Total onboarding speed | Shows whether setup is actually getting faster |
| First receipt accuracy | Accuracy on the first inbound | Confirms item setup, barcode rules, and receiving steps were right |
| First order accuracy | Accuracy on the first outbound orders | Shows whether picking, packing, and shipping rules worked in real use |
| Integration success rate | Percentage of integrations working as planned at launch | Flags whether data flows were ready or patched together |
| User training completion | Percent of required users trained before go-live | Reduces day-one confusion and support load |
| Support tickets in the first 30 days | Number and type of launch-related issues | Reveals whether the process was clean or just rushed |

These metrics work best together. For example, a shorter go-live timeline looks good at first. However, if first receipt accuracy drops or support tickets spike, you did not improve onboarding, you just moved the mess downstream.
Keep the review simple. Look at trend lines by client launch, then compare the last three to five onboardings. If time to go live is falling while accuracy stays high and early ticket volume drops, your workflow is improving in the right way. If not, go back and find the weak handoff, data gap, or training miss. A strong habit of implementing warehouse KPIs can help teams keep that review focused and useful.
Faster onboarding only counts when the first month runs clean.
Review onboarding wins and failures after each new client launch
Once a client goes live, do a short post-launch review while the details are still fresh. This does not need to be a long meeting. In most cases, 20 to 30 minutes is enough if the right people are in the room and the discussion stays honest.
Use the same few questions every time:
- What slowed us down?
- What data was missing or late?
- What had to be done manually?
- Which issues created the most support tickets?
- What should become a template, checklist, or automation next time?

This step matters because memory fades fast. A launch problem that feels obvious today can disappear into busy work next week. When you capture it right away, you can turn one hard lesson into a repeatable fix.
Look for patterns, not one-off complaints. Maybe client data always arrives incomplete. Maybe billing setup keeps waiting on rate approvals. Maybe warehouse users finish training too late. Those recurring slow points are where your next gains live. If you need help spotting patterns in workflow delays, this guide on measuring and fixing bottlenecks fits well with this monthly review process.
Over time, these reviews create a feedback loop:
- Launch the client.
- Measure speed, accuracy, and support load.
- Review what worked and what failed.
- Turn fixes into templates, rules, or automations.
- Use the updated workflow on the next client.
That is how onboarding gets better month after month. Not through guesswork, and not through more hustle alone. You improve it by learning from every launch, then baking those lessons into the next one.
Conclusion
Faster 3PL onboarding doesn’t come from pushing people harder. It comes from repeatability. When your WMS supports clear workflows, clean data, smart integrations, and shared training, each new client starts with less confusion and fewer costly misses.
The practical path is simple: map the bottlenecks, standardize setup, automate key integrations, train both the client and your team on the same process, and track what happens after go-live. Then keep refining the workflow with each launch, because small fixes add up fast.
If your current system still relies on spreadsheets, side chats, and memory, it’s worth reviewing whether it can support a more consistent onboarding model. A solid step-by-step WMS implementation guide can help frame what that process should look like.
3PLs that onboard clients faster, and do it cleanly, can scale with less chaos, better accuracy, and a stronger client experience from day one.